Showing posts with label snack. Show all posts

Wednesday, April 20, 2016

Spinach and Artichoke Hummus Dip


These are truly a few of my favorite things!! Look!


The ultimate dip mash-up. Perfect for pita chips, chopped veggies, spread on toast, straight off the spoon...


Don't judge me, guys. This Spinach and Artichoke Hummus Dip is everything we always wanted but never knew we needed. Smooth and creamy, bold and full of flavor.


I was inspired to make this dip when I was eating a (ready-made) spinach hummus and thought...we could do better. We can kick things up a notch. Everyone loves spinach and artichoke dip, so why shouldn't we combine it with a smooth homemade hummus, another universally loved dip? The answer is clear: we should combine them, and I did just that and will never go back.


Although the classic spinach dip is made with cream cheese and mayonnaise, I decided to add Mediterranean flare by using greek yogurt and feta cheese. Both yogurt and feta are delicious with hummus, like on a gyro or falafel plate, so it is natural to mix them all together for our dip smash-up!


Prep of this dip couldn't be easier...I simply prepare each dip separately, then gently fold them together like folding egg whites into a cake batter. This ensures that we can taste the components of each dip while at the same time creating a cohesive and smooth spread. Season along the way, as well as one more time at the end. This is a real crowd-pleaser and I can't wait for you guys to try it!!

Friday, March 25, 2016

Broccoli Mozzarella Pinwheels


My friend called these "savory cinnamon buns of deliciousness." That's really all you need to know.


But, you know me. I can't leave well enough alone. I need to gush on and on and on. And these golden brown, ooey gooey beauties are worth gushing about.


So here's the thing. I've made many homemade pizzas before. And that includes homemade pizza dough, plain // whole wheat // honey whole wheat, I can do it. But trust me when I say, for pinwheels, a store-bought dough is the way to go. Yes, it's in a can, yes, you pop it open with a spoon, and YES your pinwheels will be perfect every time!

My Broccoli Mozzarella Pinwheels are loaded with finely chopped, garlicky broccoli and melty mozzarella cheese. A sprinkle of red pepper flakes adds the perfect amount of heat and keeps your taste buds happy with every bite.


But I promised you next-level pinwheels, and that means they need some extra-special lovin'. Just before we bake these beauties, we melt a whole bunch of butter in a saucepan with chopped garlic and parsley. The butter is brushed on top of the pinwheels, then they get sprinkled with grated parmesan cheese. Golden brown glory.

This recipe can easily be doubled for a party, or served for dinner with a light salad. I always put out some marinara sauce for dipping. You can cut the rolls as big or as small as you want, I can usually get between 6 and 10 rolls depending on how much I roll out the pizza dough. No matter how you cut em, you're going to l.o.v.e. em!


Wednesday, July 10, 2013

Strawberry and Goat Cheese Crostini


I am so obsessed with goat cheese. It's one of those things I'll see in a dish on a menu and immediately order that without looking at the rest of the offerings. It's creamy, and soft, and just a little bit tangy.


Goat cheese is an all-inclusive cheese. It works well with savory dishes and is also great with some sweet pairings.


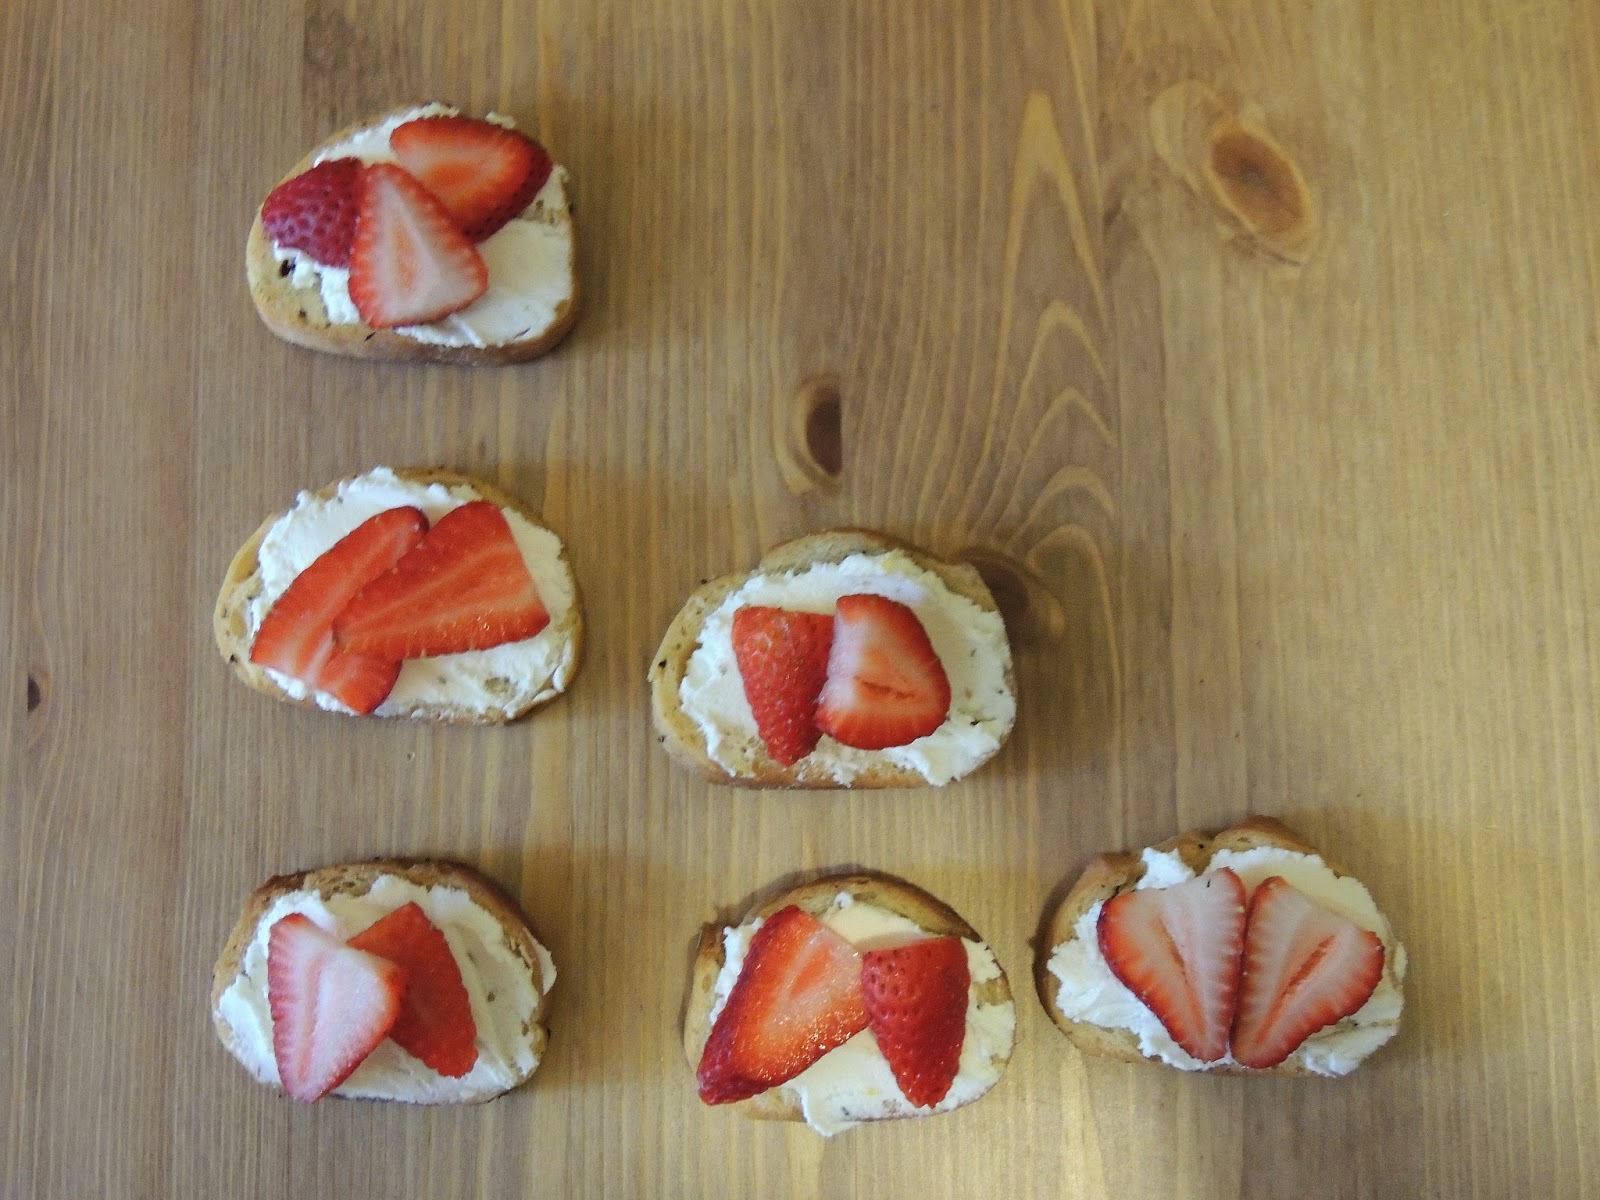
I particularly love goat cheese in these delicious snacks I made last week. The cheese is mixed with lemon and honey, spread on top of crispy crostinis and topped with slices of fresh, ripened strawberries.


These Strawberry and Goat Cheese Crostinis are the perfect summertime appetizer or snack. With the exception of toasting the bread, there is hardly any time spent dwelling over a hot stove. The strawberries are sweet and juicy, the perfect compliment to the natural sweetness of the honey. The soft goat cheese spread on top of crispy baguette slices is just the contrast you crave in a small bite. Simple but elegant--sounds like a great deal to me!


Here's what you need for Strawberry and Goat Cheese Crostinis (Print Recipe!)

1 French baguette, cut into 1/2 inch slices
4-6 ounces fresh goat cheese
Zest of 1 lemon
2 tablespoons honey, plus more for drizzling
1 cup strawberries, sliced thin vertically

Here's what you do

Place the slices of bread on a dry baking sheet. Bake at 400 degrees for about 5 minutes until just browned. Watch carefully to ensure they don't burn. Set aside to cool.

In a small bowl, use a fork to mash together the goat cheese, lemon zest, and 2 tablespoons of honey. Add in a splash of lemon juice if the mixture isn't smooth.

Spread about a tablespoon of the goat cheese mixture onto each baguette. Arrange 2 to 3 slices of strawberries on top of the goat cheese. Drizzle with more honey just before serving. Garnish with torn mint leaves if desired.


Tuesday, May 21, 2013

Spicy Taco Layer Dip


I love this time of year. When summertime rolls around that means it's just the right time for backyard barbeques and cookouts.

I also happen to love the food that comes along with cook-outs. Grilled chicken, juicy burgers, crispy hot dogs, creamy pasta and potato salads. All American good food.


This Spicy Taco Layer Dip is the perfect dip for a backyard barbeque. The warm, creamy layers blend together with just the right amount of heat for an extra kick. Spicy taco seasoning and medium heat salsa give this dip some extra oomph. Melted shredded chedder on top along with rich cream cheese on the bottom tempers that heat for a well balanced dip. Serve alongside your favorite tortilla chips and celery sticks.


Oh, by the way. If you're looking for something that is quick and simple to bring to your Memorial Day barbeques this weekend, I'd say this dip has you covered. Prep time is less than 15 minutes, and after just a few minutes under the broiler it's ready to be served.

And I guarantee your fellow party-goers will be coming back for seconds and thirds and fourths.


The layers are quite simple. It all starts with softened cream cheese in a deep, round or oval baking dish or casserole dish. I actually used the 1/3 less fat variety of the cream cheese, because why not save a few calories here and there?


On top of the cream cheese goes refried beans. The beans don't really add much in the way of taste, but this layer is a good filler and stretches the dip even further. They are creamy and tender, and the perfect partner to the cream cheese.


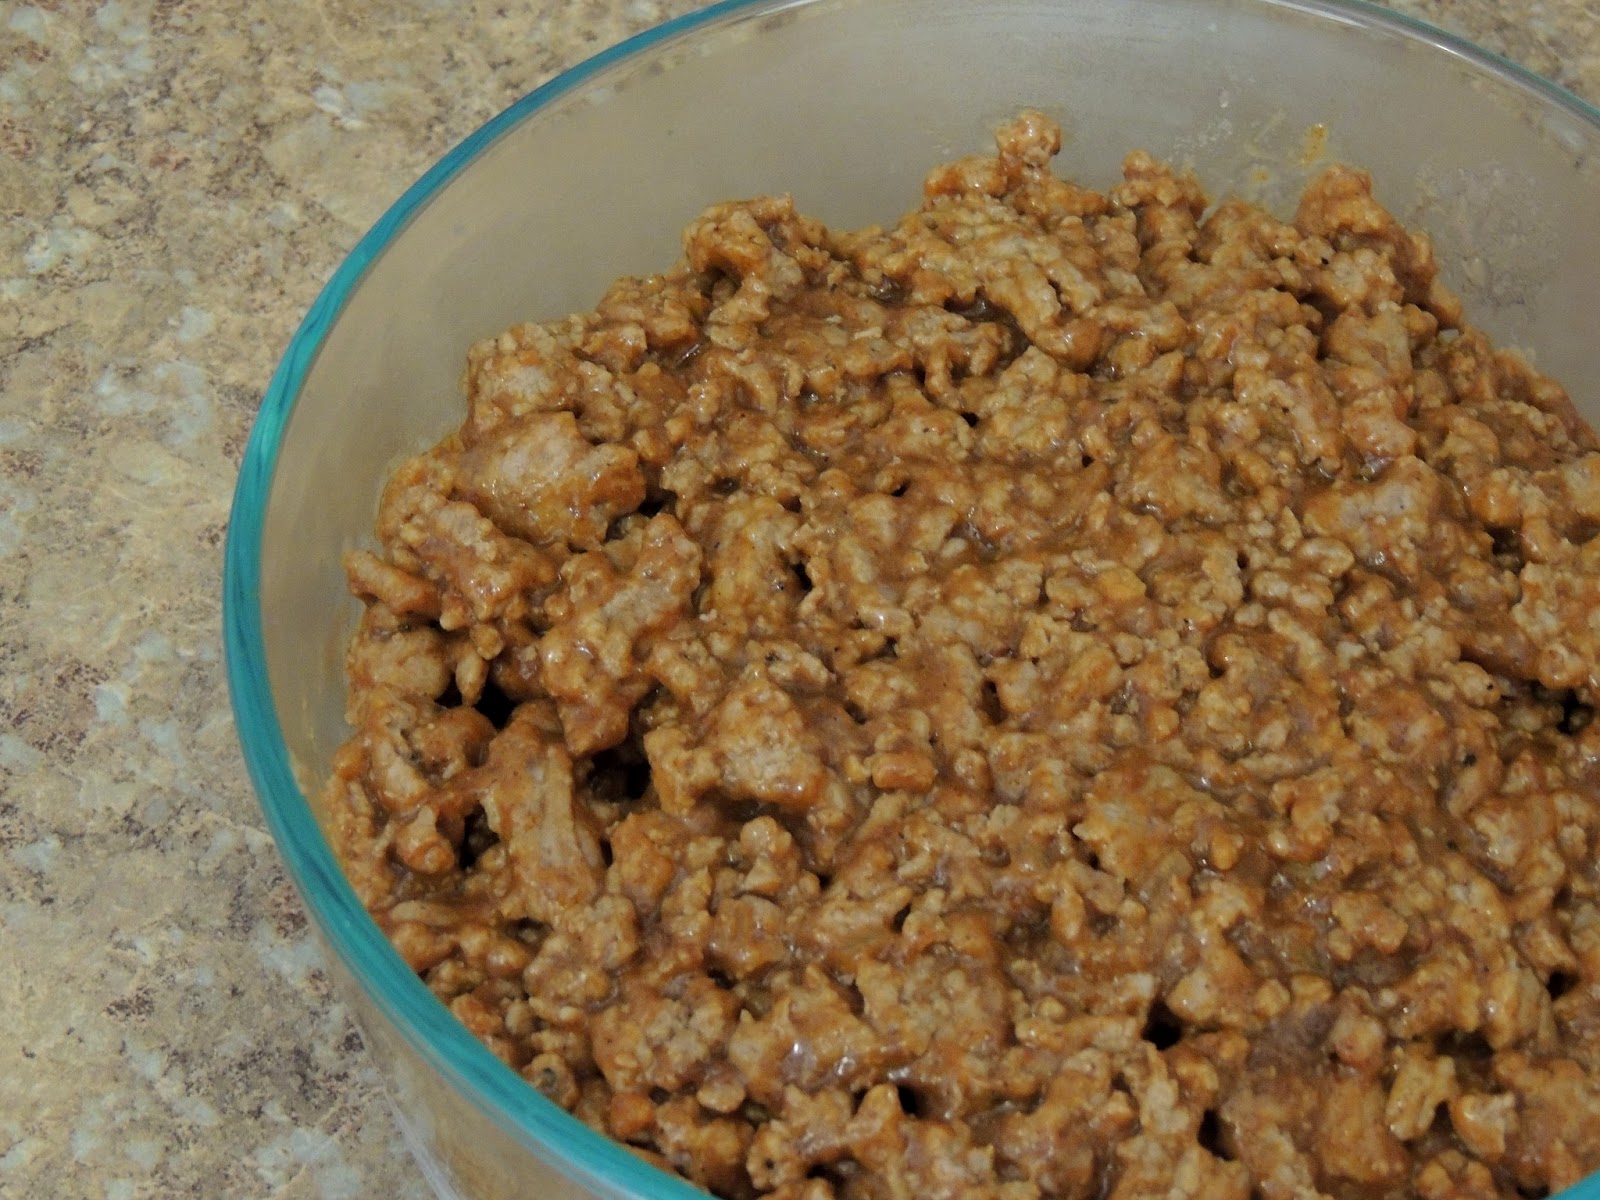
A pound of ground meat (I used ground turkey, because that's what I had on hand) gets browned and crumbled with 1 medium onion. A package of taco seasoning and a touch of water go in to create that amazing juicy taco meat we all know and love. Don't deny it, there's no reason to.


Taco meat on top of beans.


A jar of salsa on top of taco meat. I used medium, but if you're a crazy hot and spicy lover, you can bump it up to hot salsa.


Shredded cheddar cheese on top.


The dip goes into a hot oven for just about 10 minutes, until the cheese is melted and just starting to brown and the layers are heated through. The salsa will loosen up a little bit, but after it sits for a few minutes, it gets absorbed by the meat and beans for carefree dipping.

That's all it takes for a delicious, gooey taco dip. Garnish the top with chopped fresh chives, chopped tomatoes, or black olives if your heart so desires. I hope you and your friends can enjoy this dip all summer long!

Sunday, January 13, 2013

Homemade Soft Pretzel Sticks

Have you seen those Sonic commercials with the two guys in the car...the one guy has a notebook of all the times his mind has been blown?

Well, my mind isn't usually blown at Sonic but there are a few stick-out mind blowing moments in my life.


No moment was as mind blowing as the first time I made these homemade soft pretzel sticks. I expected complete failure and a prompt trip to the mall for some Auntie Anne's. Boy, was I (happily) wrong.

When they came out of the oven, I think I almost cried tears of joy. They are lovely golden brown, puffy pillows of soft pretzel bliss.


I think the worst part of this recipe is the waiting...waiting for the yeast to activate, waiting for the dough to rise, waiting for them to bake.

The best part is the eating. These pretzels are so delicious I actually had to hide the leftovers from myself. I knew that I couldn't be trusted to not sit on the couch and eat the whole batch. It's good I know myself so well.


Ok, let's talk pretzel.

Start by combining a package of dry active yeast to the bowl of your brand spanking new Kitchenaide mixer along with brown sugar, melted butter and warm water. Mix it with a dough hook and let it rest.


Once activated, it will look something like this:

After 5 minutes, add in the salt and the flour, in batches. The dough will start to pull away from the bowl.

Knead the dough into a ball and place it in a bowl greased with canola oil. Cover it with a clean towel. This is when the first treacherous waiting period begins...1 hour. Let it rise.


Just before the hour is up, a large stockpot is filled with 3 quarts of water and 3/4 cups of baking soda and brought to a boil.

Now is the fun part. Cut your dough in half and gently tear off large pieces. Roll them between your hands to create evenly sized logs. Try to be as precise as possible, but because we are humans a little bit of error is fine.


Or get crazy and make actual pretzels. I had a giggle fit after I made this...


Each of the sticks go for a bath in the pot of water and baking soda, for no longer than 30 seconds!


Transfer to a parchment paper lined baking sheet. Brush each pretzel with an egg wash...sprinkle on some salt.


To a 400 degree oven they go!


And then...2 tablespoons of melted butter...mixed with garlic powder, onion powder, and a little more salt. The hot hot hot pretzels get brushed with butter.


Your knees will probably go weak at this point.


These are best served immediately hot and fresh out of the oven. You can serve them as is or alongside some good Dijon or honey mustard. However, leftovers will last well wrapped for about three days. I recommend giving them a quick heat-up in a 200 degree oven!


If you want to be the star of your Super Bowl party, these pretzels are a wonderful option. They are soft yet crunchy, salty and buttery and totally swoon worthy.