Saturday, June 30, 2012

Crispy Parmesan Brussel Sprouts

You read that right.

This is a post about Brussel Sprouts.

That curious vegetable that most children are certain without even trying them that they are truly disgusting. The vegetable out-law.

I was one of those children. I had never heard anybody say -- "YUM! I LOVE brussel sprouts! I could eat brussel sprouts for breakfast, lunch, and dinner!" And so, for this reason, I was positive that brussel sprouts were disgusting. I was set on never EVER eating a single brussel sprout so long as I lived.

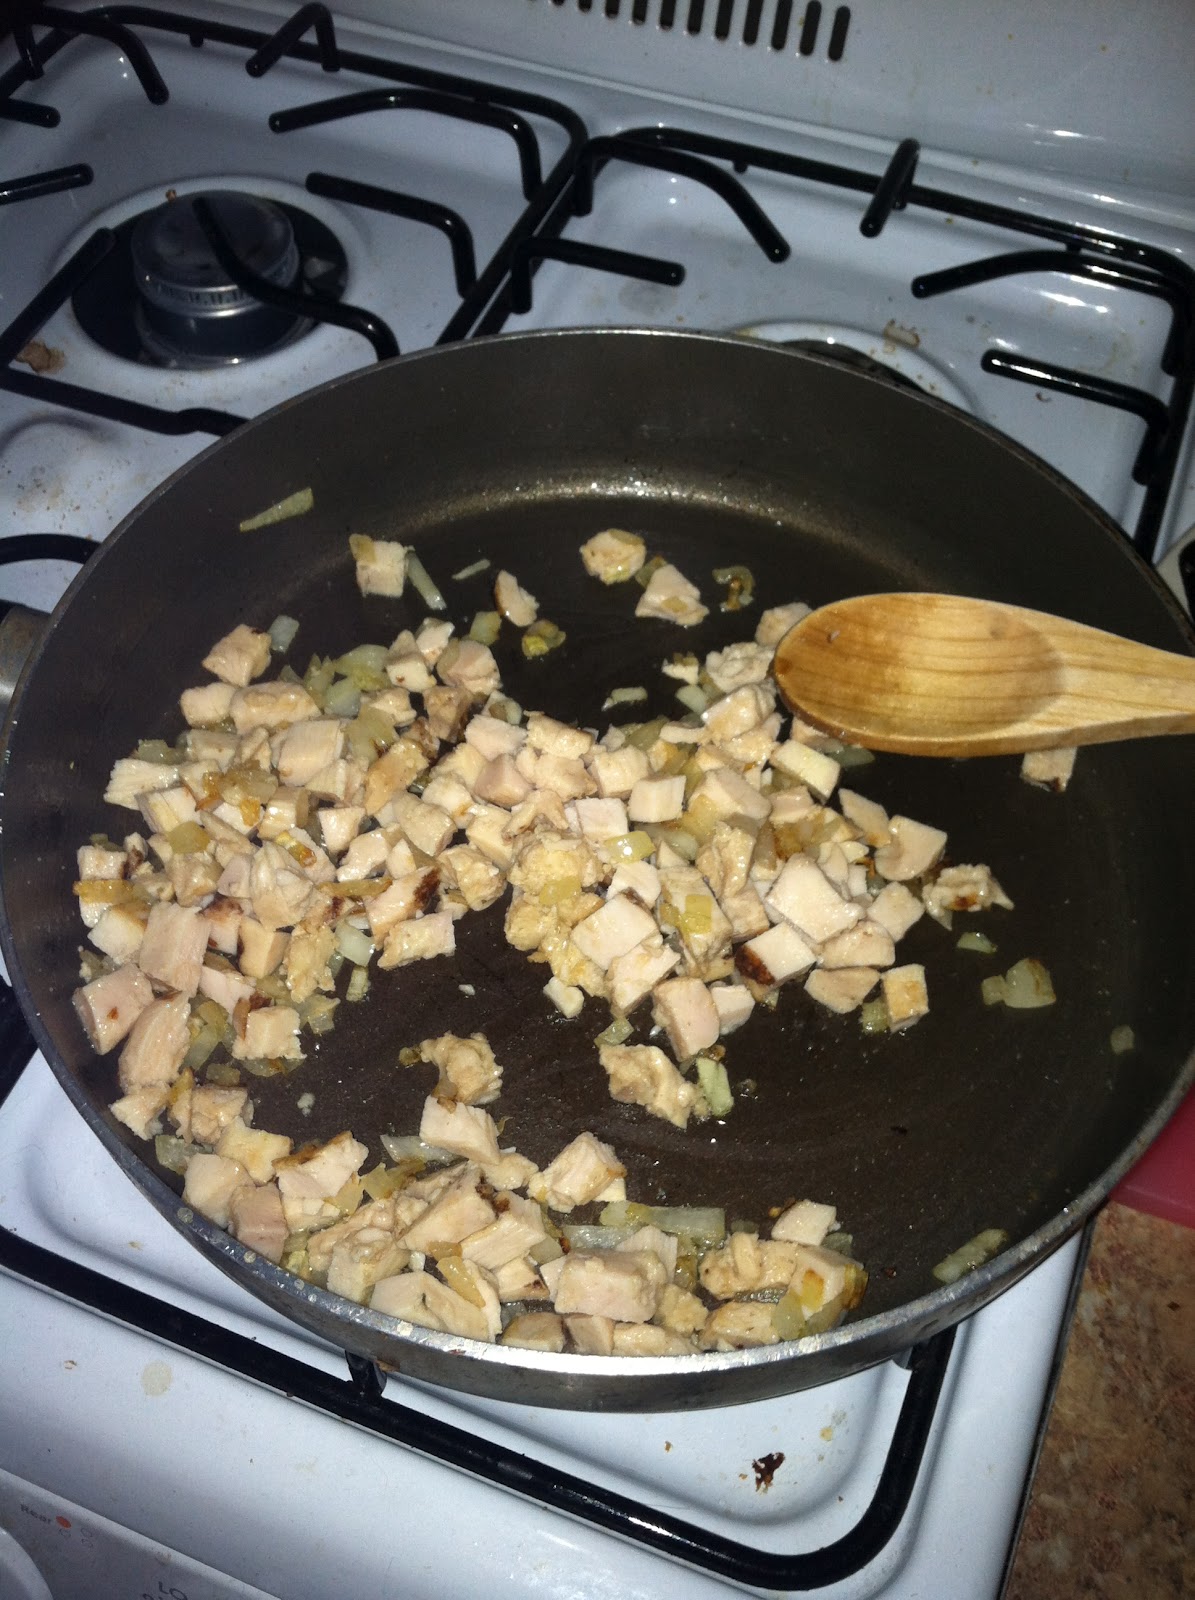
Things changed this Easter when my aunt made a side dish that consisted of brussel sprouts and pancetta. I was more or less bullied into trying the brussel sprouts and, much to my surprise, I returned for seconds...and thirds.

If I had to describe what this vegetable is like, I'd have to say it's very simply a miniature cabbage. It tastes a bit woody and a little bitter, but it's flavor can be enhanced through the right cooking techniques (think: pancetta). A quick Google search tells me that it has a nutrient profile similar to broccoli.

Since that Easter meal, I have been wanting to try whipping up some brussel sprouts in different ways. Well, two months later I finally got around to preparing brussel sprouts for one of my dinners. I must say, even if you are one of those "never going to eat brussel sprouts in my life" folks, you would have gobbled my brussel sprouts up (consider my own horn, tooted).

A flash frying and a little bit of parmesan cheese make these irresistible. And with a total prep and cook time of 10 minutes, it's a great way to fancy up a weeknight dinner.

Here's what you need for Crispy Parmesan Brussel Sprouts:

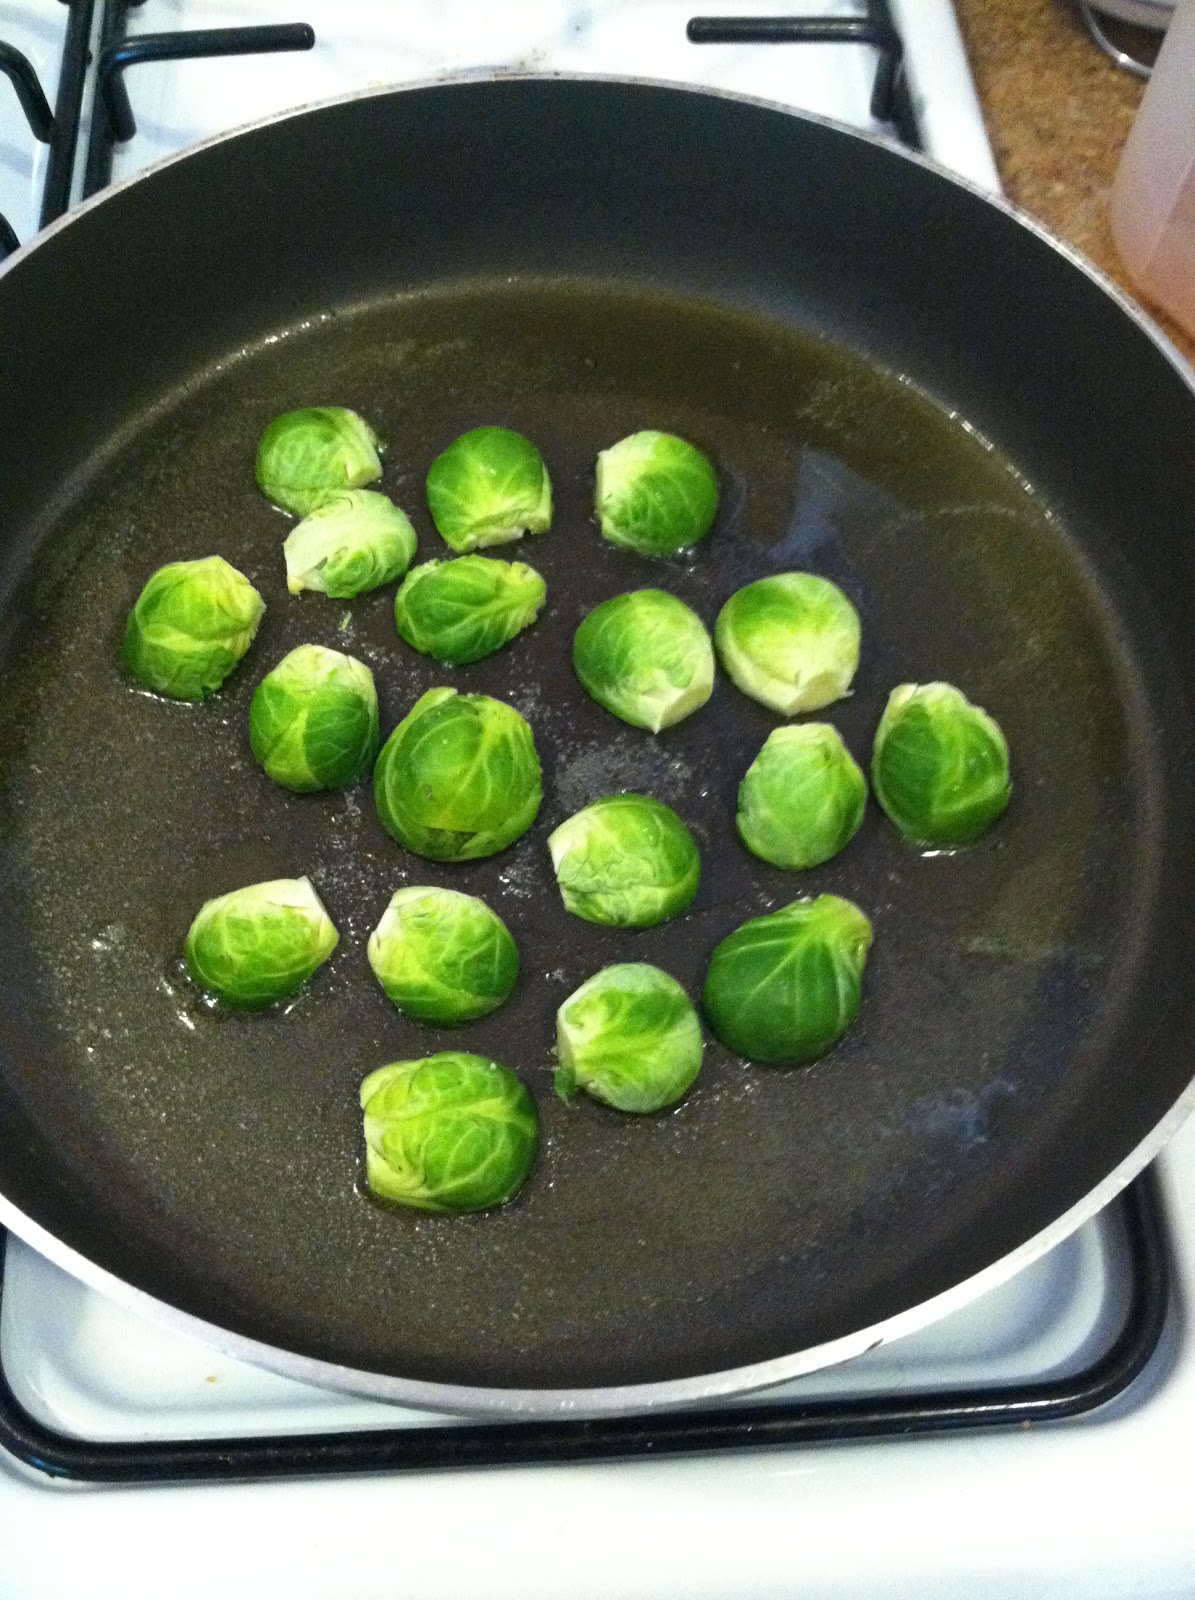
20 small brussel sprouts (try to find as many as you can that are of similar sizes. If some are larger and some are smaller, they will cook unevenly--this goes for almost any preparation of this veggie!)
2 tablespoons extra virgin olive oil
1/8 cup shredded parmesan cheese
salt and pepper, to taste

Here's what you do:

Heat almost all of the oil in a flat-bottomed frying pan over medium heat.
Remove the stems of the brussel sprouts and cut in half length-wise. Toss and coat in the remaining oil.
If you are cooking over an open flame (GAS STOVES, HAAAYYY!!), reduce heat to low and place the brussel sprouts, cut side down, in the frying pan. Sprinkle with salt and pepper.


Cover the pan with a tight-fitting lid and cook for 5 minutes or until the bottoms start to brown and the insides become tender.
Remove the lid and increase the heat slightly. Cook for 2 to 3 minutes. This will allow the bottoms to get super crispy and I found that they caramelized slightly.
Flip the brussel sprouts to get a slight browning on the round side.


After 30 seconds, add the parmesan cheese and turn off the heat. Any cheese that immediately hits the bottom of the pan is going to get brown and crisp and amazing. The rest will melt beautifully onto the crispy edge of the brussel sprouts.


Serve immediately!


You want to be careful not to overcook these. Overcooked brussel sprouts lead to a very unpleasant flavor in general. But, with this recipe, because you do not constantly flip and turn the veggies in the oil, things can get charred very easily. A little finesse and a keen eye will ensure a golden brown, tender, and delicious side dish!


I paired them with citrus scented quinoa and baked tilapia with browned onion slices! Amazing!


Are you scared of brussel sprouts? Or do you have a go-to recipe to make them deliciously irresistible?

Wednesday, June 27, 2012

In case you missed it

It has really been a lot of fun for me to be able to create and cook new meals and share them with everyone on the world wide web. I started this blog on January 9 of this year because I love to write and I love to cook. I cannot do these things, as it stands now, for my day job so this outlet has been great for me.
It's been even more rewarding to see how many people enjoy reading my blog and cooking the recipes I share! I never would have imagined I could have kept people entertained for this long! Whether it's the food or the stories or the experiences you enjoy, it is my hope that I can continue sharing and you can continue reading.

In honor of YOU, my readers, I have taken a look back at my most popular posts. And for any newbie home cooks out there, perhaps some of these will once again inspire you to try your hand at delicious homemade meal.

So here they are -- in case you missed it -- the top recipes from "Gas Stove Girl"
January 2012 to July 2012!

5. Fifth place is held by two of my newer recipes.

Chicken Pot Pockets
Warm veggies and chicken swimming in gravy reminscent of a hearty pot pie get a new look when I placed them into pockets of puff pastry. Great for a dinner party, as you can easily make the filling a day ahead of time.

Simple Guacamole
Avocados, finely diced onions, a ripened tomato, fresh lime juice, garlic, and seasonings make this summertime dip unforgettable. Need something quick to bring to a summer cook out? This recipe has you covered!

4. A dessert and a dinner tied for fourth place.

Nutella Brownies
Inspired by a gluten-free blogger, these bites of brownies have all the flavor profiles of our favorite cocoa-hazlenut spread. Great to bring to a birthday party for a quick, low maintenance, and bite-size dessert!

Chicken Noodle Soup with a Lemony Twist
Lemon zest is the most amazing ingredient, and it elevates a classic chicken noodle soup recipe to the next level. The flavor profiles marry beautifully the longer the soup simmers. Feel a cold coming on? Or a chill in the air? Load up on chicken stock and get cooking!

3. Stuffed Chicken
Pantry clearing dinners don't need to consist of Kraft Mac and Cheese and hot dogs. In this post, I show you how I took my leftovers and created a juicy and flavorful dinner that can rival with any restaurant chicken dish!

2. Spinach and Goat Cheese Lasagna Roll Ups
Lasagna gets a massive makeover with a few ingredient upgrades and a new look. Instead of layering marinara, meat, cheese, and noodles, I made pasta rolls with ricotta, goat cheese, spinach and garlic. Top with the perfect homemade pesto and cheese, bake 'em, and enjoy. Want to serve a meal to a bigger group at a small cost? This recipe will have your friends thinking you've taken cooking classes!

1. Finally -- all of these Awesome Appetizer Recipes from Food Network Chefs
It's no surprise this post came on top as the far away winner. There is so much you can learn and even more that you can cook. Each of these recipes are not difficult and they make serving a crowd a sinch! I've never hosted a cocktail party before, but these recipes made sure that I didn't disappoint! Give one or all a try!

What has been YOUR favorite "Gas Stove Girl" post? Any requests for the cook behind the computer?!

Friday, June 22, 2012

How To: Flip a Perfect Omelette

I absolutely love the weekend for a number of obvious reasons. Perhaps the best part about a relaxing weekend in my eyes is that I finally have time to cook up a nice big breakfast.

I usually like to kick start a weekend with eggs! Eggs are awesome as we know. There is so much you can do just for breakfast with these delightful pockets of protein.

Perhaps my favorite way to use eggs in the morning is in a veggie-packed Omelette! For a while though, my omelettes always turned into scrambles. I couldn't master the damn flip!

Alas, as with most things, practice seemed to make perfect and I could not be happier. The perfect Omlette flip allows you to get a taste of your entire filling in every bite--awesome!

It takes a little bit of finesse and the right equipment to flip an omelette beautifully--but trust me, it can be done!

The equipment you need is a flat-bottomed frying pan with a diameter no bigger than 12 inches (10 inches is ideal) along with a thin spatula.

For the omelette itself, start by whisking 2 or 3 eggs with about 2 tablespoons of milk. Lightly spray the pan with an olive oil spray or cooking spray. Heat it up slightly over medium-low heat.

Now, take your scrambled eggs and dump them into the pan. Pick up the pan and tilt it so that every part of the pan is covered by the egg mixture.

On one half of the pan, add your filling of choice along with a 1/4 cup of cheese of your choosing. Leave about half an inch between your filling and the edge of the egg to prevent spillage!

Let the eggs and fillings cook for about 5 minutes or just when the egg starts to rise and separate slightly from the pan. Take your spatula to lift up slightly the half of the omelette that does not have the filling cooking on it. Using your thumb and pointer finger, gently pull this half of the omelette over the filled half, covering completely.

Reduce the heat to low and cook another 1 to 2 minutes. At this point you should be able to cleanly flip the entire omelette, cooking the other side for another minute.

The result should be a half-moon shaped, slightly browned and golden delicious omelette with warm and oozing insides! If you don't want your eggs to become too browned, cook the entire omelette over low heat. This will obviously increase cooking time but it will prevent the olive oil from burning.

I stuffed my omelette with sliced cherry tomatoes, spinach, chopped mushrooms and Parmesan cheese. It was delicious! And beautifully flipped!

Inspired: A Delicious Dinner Salad

Every now and then, we all have that moment where our minds are just bursting with creative ideas. For me, that tends to happen in the kitchen because I am simply not the artsy type. Food, if you will, is my canvas.

Ok, I’ll leave the lame metaphors there. Because my creative food endeavors are not my point here. My point is, more often than not, we foodies need to be inspired by others and cannot always rely on our little brains to think up something delicious. Cooking has been a part of mankind’s everyday life since…well, a whole lot of years ago. People have tried and failed and tried again and succeeded in the kitchen – why not learn from the mistakes and conquests of others when it comes to our bellies?!

I have always been of the belief that recipes are out there to help jump-start our creative juices. Save for baking, they are really more like guidelines and suggestions and tips. As I have tried different meals and techniques, I find myself becoming inclined to try my luck cooking different dishes I have out at restaurants in my home kitchen.

And why not?! If we have a meal that is so memorable we want to recreate on our own, it must have been a delight!

Pretty much everything I have eaten at Parish CafĂ© on Boylston Street has been amazing. I absolutely love this place – lunch, dinner, anytime of day I could eat their food. Their sandwich menu is a compilation of great sandwiches from chefs at other restaurants throughout Boston, and they also have entrees from their chefs. Some of the sandwiches are too amazing and complex to recreate, though I don’t mind the excuse of needing to go to Parish to have one.

However, a few months ago I had the Hot and Cold Chicken Salad (a Parish-original) and enjoyed it so much that I started thinking about how I could recreate it at home. It is a sweet and sour salad with warm chicken and rice alongside cool, crisp veggies and sweet caramelized almonds. The dressing is a delightful teriyaki vinaigrette.  I made a few adjustments to account for things I had around the house. Overall, it was truly reminiscent of this excellent entree salad. Give it a try, and if you like what you have here then head on over to Parish Cafe for the original!

Here's what you need:

1 head romaine lettuce
3 handfuls of arugula (I was really arbitrary with the measurements -- apologies in advance!)
1/2 cup sliced almonds
1/2 cup sugar snap peas
1 fruit cup of mandarin oranges, drained of the juice
2 sliced chicken breasts
2 cups rice (preferably stick, but I happened to have brown rice on hand and it worked well!)
Ken's Asian Sesame Ginger Soy Low Fat Salad Dressing
Low sodium soy sauce
Lime juice
Olive oil
Salt, Pepper, and Garlic

Here's what you do:

Cook the rice according to the package, replacing 1 cup water with 1 cup low sodium chicken broth.
Sautee or grill the chicken in 1 tablespoon olive oil and 1 teaspoon minced garlic. Set aside to cool.
Toast your almonds on a baking sheet at 350 degress for 5 minutes or so. DO NOT BURN!
 Roughly chop the romaine lettuce and toss in a large mixing bowl with the arugula.
Cut off the tips of the sugar snap peas and add to your mixing bowl along with the drained mandarin oranges.
In a small bowl, add 3 parts of the sesame ginger dressing with 1 part soy sauce, 1 part lime juice and 1 part olive oil. I cannot say exactly what measurements I had for the dressing, but this is the ratio of that. Adjust it continually as you taste the mixture. Add salt and pepper. Taste again and adjust as you please.
Add the dressing gradually to the lettuce mixture, tossing to coat. Do not add all of it at once -- do this in waves to assure you are not left with a soggy bowl of veggies.


 On each serving dish, scoop 2 large spoonfuls of rice onto the center of the dish. Top with a generous helping of the salad mix and 4 to 5 slices of chicken breast. Sprinkle with the toasted almonds and enjoy!

I made this meal when it was over 90 degrees here in Boston. It was a quick and low maintenance dinner that required very little time over the stove which was so worth it in the heat! Plus, it was light, refreshing, and filling. Although not exactly like the original dish, it definitely had the sweet and sour, warm and cold harmony I was looking for! Yuuuuuummmmmmyyyyyy!


Have you ever recreated or thought to try making a dish that you had at a restaurant? How did it go?!

Monday, June 18, 2012

How to: Build a Better Stir-Fry

Whenever I am in a pantry-clearing, refrigerator-purging mood, I always think Stir-Fry. Regardless of the veggies I have on hand, the proteins stored away in my freezer, the seasonings in my spice rack, and the starches taking up space in the cabinets, I am always confident that some kind of stir-fry dish can come together for a quick and delicious dinner.

Stir fries, however, cannot be executed by a heavy hand. One cannot simply chop all their ingredients, heat up some oil, and throw all of said ingredients in for a frying pan ride! But why—WHY?! You might ask. Well, here are some answers.

First of all, a stir-fry dish is elevated to the next level if and only if flavors are built up and married. This may require a bit more patience on part of the home cook, but the results are sure to please. Take your sauces, for example. If you toss everything in the oil, douse it with some kind of sauce or marinade, and let it rip, much of the flavor will do one of two things: cook off or become too soaked into the ingredients (nobody likes a soggy stir-fry). Think of your high school shop class days: measure twice, cut once was the old adage here. In the world of stir-fry, let’s just say taste twice, or thrice, or four times, and serve once.

Now let’s think of our vegetable drawer. More likely than not, you are going to have a wide range of veggies just waiting to come to the stir-fry party. But what if this is what you’re working with: frozen broccoli, summer squash, zucchini, carrots, and celery. Odds are, it will be best if the frozen broccoli gets cooking long before the delicate summer squash, which needs only a few minutes over heat to get tender. And if carrots and celery are too late to the party, their crunchy texture will not marry happily with the soft zucchini. What I’m saying here is that veggies should be added in layers. Bring in the frozen veggies first and gradually add the fresh vegetables in order of most crispy to most tender.

Lastly, it is important to be aware of the protein you are working with. Are you using chicken breast that has already been cooked? Or are you browning up raw ground meat? Similar to my theory on the vegetables in a stir-fry, it is important to add in your protein at the right point in the cooking process. If your protein is still raw, brown up onions and finely chopped mushrooms to get some flavors moving, and then cook your meat thoroughly before adding any more vegetables. If your protein has already been cooked and just needs some flash-frying to reheat it, add it a little later when more of the sauces are in the pan to get the chicken, or turkey, or beef tender again.

Last night, I put all of these simple rules of thumb in action for a great Asian-inspired Ground Pork Stir-Fry. Below is the recipe. Jazz it up as you want and make use of the ingredients taking up space in your pantry—the options are endless!


Here’s what I had lying around the kitchen:

¾ pound ground pork
1 medium yellow onion, chopped
1/3 cup finely chopped mushrooms
2 celery stalks, chopped to yield about ¼ cup
8 baby carrots, chopped to yield about 1/3 cup
1 egg
½ cup frozen broccoli
1 yellow squash, chopped to yield about 1 cup
½ cup fresh spinach, roughly chopped
4 tablespoons low sodium soy sauce, plus more for drizzling
2 tablespoons fresh squeezed lime juice
2 teaspoons Worcestershire sauce
1 teaspoon chili powder
 
Here’s how I built a delicious stir-fry:

Heat up olive oil in a heavy bottomed frying pan over medium heat.
Add in onions and mushrooms. Sprinkle with about ½ teaspoon salt to begin the caramelizing process. Cook for 5 to 7 minutes until the onions are slightly browned and the mushrooms begin to release some of their moisture.
Add the ground pork and break up the meat into the onions and mushrooms. Cook until fully browned, 7 to 10 minutes, stirring occasionally. If you need to drain any grease, do so at this point before any flavoring is added.
Add the Worcestershire sauce and stir to coat.
Add the frozen broccoli and cover the frying pan to lightly steam the florets.  After 5 minutes, remove the lid and stir.
Add the carrots and celery. Cook for about 5 minutes then stir in the lime juice. Allow the carrots and celery some time to cook down before adding the egg (scrambled). I created a space in the center of the pan to let the egg stiffen before mixing in to the rest of the stir fry.
Add the summer squash, chili powder, and half of the soy sauce. Mix well and cook for 7 to 10 minutes, stirring occasionally.
Finally, add in the spinach and the remaining soy sauce. Cook until the spinach is wilted. 


Serve over sticky rice and drizzle each dish with a touch more soy sauce!


What is your favorite stir-fry dish? How do you bring your flavors to the next level?

Monday, June 11, 2012

Slow Cooker Pot Roast Dinner

Last Christmas, I was spoiled. My mom knew I had started to get more creative in the kitchen and rewarded me heartily on Christmas morning. A fresh cheese grater, a blender/food processor combo, a Keurig machine—JACKPOT! She must have spread the word, because later that day my aunt, uncle, and cousins gifted me with a Crock Pot.

The Crock Pot – otherwise known as God’s gift to the working women who long for a hearty, rich meal on weeknights. Also known as God’s gift to the world.

I digress…

Basically, along with all my other new kitchen gadgets, I LOVE my crock pot. There are so many things you can do with it and the options are seemingly endless. Plus, most importantly, all the cooking is done while you’re at work (or out shopping or vegging on couch). Most crock pot recipes also tend to leave me and the BF with plenty of leftovers (another dream for the 9 to 5 folk out there). I made pulled pork a few months ago and let me just say that we had two full Tupper Wares of leftovers that week.

So: days of leftovers, hearty meals, zero cooking after work. The makers of the slow-cooker really caught lightning in a bottle with this one.

I wanted to try something new this week with my beloved Crock Pot. I was watching a re-run of The Pioneer Woman (another Food Network program, of course) and she was cooking up a most delicious-looking Pot Roast. I knew some fellow foodies out there must have thought up some killer Crock Pot Pot Roasts (say that 5 times fast) and so to Google I went.

I embodied some of the basics in the recipe below. When all was said and done, a juicy, tender pot roast with flavorful veggies and a rich gravy awaited my fork and knife.

 
Here’s what you need for my Slow Cooker Pot Roast Dinner:

A 2 to 3 pound pot roast
3 to 4 medium red potatoes (to me, pot roast calls for red potatoes. Feel free to use whatever potato you desire)
2 carrots, peeled and chopped
3 celery stalks, chopped
1 package dry onion soup mix
1 cup water
2 cans condensed cream of mushroom soup (I used Cambell’s Healthy Choice)
1 tablespoon Worcestershire sauce
Salt and pepper to taste

Here’s what you do:

Prepare veggies as instructed, and dice the red potatoes into 1-inch cubes. Season with salt and pepper.
Place the pot roast into the slow cooker.
Add the veggies and potatoes to the slow cooker.


Add the soup, water, Worcestershire , and onion mix. Stir well to combine and ensure the pot roast is fully coated in the liquid elements. If you feel there is not enough water to account for all the veggies and meat, rinse out your soup cans with about a 1/4 can of water. 


Turn the slow-cooker on low and let it cook for 8 hours.
 Before serving, stir well.
Remove the roast from the crock pot and slice with a sharp knife (it's very tender at this point, so be sure to slice against the grain!)


Use a serving spoon to top the roast with the delicious gravy and the vegetables swimming in it!


If you do choose to prepare this during a workday, try cutting up your veggies the night before. This will make it so that all you need to do in the morning is add everything to the pot.Also, if you have a larger crock pot, you may want to find a larger roast and add another potato carrot to extend the serving size! I'd say this would serve about 4.

What is your favorite meal to cook up in your Crock Pot or slow cooker?

Thursday, June 7, 2012

A quick and flavorful stuffed chicken

I was starting to feel like I was accumulating a few too many leftovers from a variety of different meals and dishes when I whipped together last night's dinner. There is no worse feeling than tossing half a bag of wilted spinach or a nice chunk of cheese that got moldy when you know damn well that you could have done something amazing with it.

Enter my fridge and pantry. Here's what needed some quick love:

3 frozen chicken breasts
1/4 bag of fresh arugula
1/2 ball fresh mozzerella cheese
1/4 bag of freshly grated parmesan
breadcrumbs
spices
1/2 small yellow onion

Here's what I did with it:

Thaw the chicken breast overnight in the refrigerator. If it is still frozen at the time you want to cook, run it under hot water for 5 minutes.
Slice the chicken breast down the middle, being careful not to cut the whole way through.
Place the chicken on a greased baking sheet.
Using a new knife and a new cutting board (nobody likes contamination), slice the fresh mozzerella into crescent moon shapes (cut each slice in half). Basically, it needs to be small enough to fit in the chicken.
Cut the onion into small chunks, about the size of a clove of garlic.
Place 2 to 3 slices of mozzerella in each chicken breast. Stuff a small handful of arugula in the chicken as well, being sure that none of the leaves spill out (they will burn and shrivel quickly in the oven if they are exposed to the direct heat).
Season the tops of the chicken with crushed black pepper, salt, garlic powder and dried basil.
Lightly dust the tops of each chicken breast with about a teaspoon of breadcrumbs and a teaspoon of the grated parmesan.
Place the onion chucks on the baking sheet all around the chicken (this will infuse a yummy flavor and leaves it up to you if you want to eat the onions or not. I devoured them happily and mixed some in my side dishes).
Drizzle olive oil over the chicken and the onions to crisp everything up.
Bake at 350 degrees for 20-25 minutes until the chicken is cooked through.
Serve alongside brown rice and vegetables of your choice!


This was really delicious and all the different flavor profiles played together really well. It was packed with peppery arugla, tart spices, and the mozzerella gave everything a smooth finish. This entire dish was completely unprepared -- I just tried to get inspired by what I had left over.

What is your most impressive left over dish?! How do you ramp up plain, old chicken into something more gourmet?

Sunday, June 3, 2012

Chicken Pot "Pockets"

I love it when I see celebrity chefs thinking of new and inventive ways to eat traditional dishes that are normally a bit cumbersome to make. Instead of only being able to indulge in such dishes at restaurants around town, they give you ways to still enjoy those belly-warming meals without breaking the bank.

Enter Melissa D'Arabian -- winner of season 5 of The Food Network Star. Her win on that show landed her a program on Food Network called "Ten Dollar Dinners." Now, I have to be honest...originally, I wasn't in love with Melissa. But as I watched her show more and more, I realized that she--as a working mom with 2 kids and a hungry husband to feed--cooks in such a way that anyone can relate. And most of her dishes can be recreated by the everyday busy home cook.

So I watched Melissa one Sunday morning. She was making chicken pot pie turnovers and stuffed veggies and all sorts of mouthwatering comfort food. It was her chicken pot pie turnovers that inspired me to make this dish. I'm coining them "Chicken Pot Pockets" -- they are not quite as gourmet as Melissa's but they were still rich and decadent! Give them a try - these little pockets of deliciousness will bring anyone back to their childhood!

Here's what you need:

1/2 yellow onion
1 1/2 cups cubed chicken (I used breast meat)
1/2 cup frozen corn kernels
2/3 cup frozen peas and carrots mixture
1 jar chicken gravy (store brand is just fine here)
1 bay leaf
1/4 cup of water
2 sheets frozen puff pastry (I used Pepperidge Farm)
Salt, pepper, and minced garlic to taste

Here's what you do:

In a heavy-bottomed frying pan, combine the corn, peas, and carrots with the water. Season with salt, pepper, and garlic. Stir to combine. When the water starts boiling, add the bay leaf and cover. Let steam for about 5 minutes until tender.

 
While the veggies soften, finely dice the onion.
Drain the veggies and return the frying pan to the heat, reducing to about medium. Add a tablespoon of extra virgin olive oil. When the oil is warmed, add the onions and brown well (ALMOST to the point of carmelizing. I added salt, pepper, and a DASH of sugar to the onions). Add the chicken and stir to combine.


Return the veggies to the pan (remove bay leaf!) and stir in the chicken gravy. Now is when you need to make a decision -- I used about 3/4 of the jar because we decided that we wanted our filling to be less "wet." However, if you want an oozing center, add the entire jar.


Bring the gravy to a slight boil. When there are tiny bubbles on the surface, reduce heat to low and cover. Let cook for 5 to 7 minutes, stirring occasionally.
Remove the filling from the heat and let it cool slightly.
While filling is cooling off, roll out your puff pastry sheet on a lightly floured surface. Cut into four even squares. Lightly roll out each square to increase your surface area.


Spoon about 2 heaping tablespoons of the filling on to the center of each square of pastry dough. Brush a small bit of water onto the edges.


Pull a corner of the dough to the opposite corner, creating a triangle. Press the edges in to seal.


Bake at 350 degrees for 15 to 25 minutes.
Let cool for 5 to 10 minutes (look at the golden brown goodness!)


Serve alongside mashed potatoes, grilled asparagus, or brown rice. YUM!


These measurements yielded enough filling for 2 sheets of puff pastry, which left 8 chicken pot pockets in total. Needless to say, I cannot WAIT to have the leftovers for lunch. Ahhh, comfort food.

Friday, June 1, 2012

Holy Guacamole!

I finally went grocery shopping yesterday for the first time in what feels like weeks. Memorial Day weekend had me travelling to New York, and I hate having a lot of groceries sitting in the fridge while I’m away. Hopefully the next week or two will bring new recipes your way!

I have a quick recipe for everyone today. It’s perfect for those summer barbeques and any sort of gathering you may be having. I made it for the first time with my friend, Jose, and I must say it will definitely be a go-to dip for me.

It’s a simple guacamole! Avocados are back in season now that it is warm out again, so this is the perfect time to give this a try. It is somewhat sweet, a little tangy and sour, and overall delicious. My dip device of choice would be Tostitos Multigrain Scoops! But, of course, you can use any chip or veggie you wish. It is also great left-over on a sandwich. YUM! Best part? NO COOKING REQUIRED.

Here’s what you need:

3 RIPE avocados – this means that when you squeeze them, they feel soft. If you are able to go to the store a few days before you plan on making the dip, leave the avocados in a warm, sunless place. This will help them ripen. Don’t refrigerate.
1 medium to large beef steak tomato
1 small to medium onion, diced finely
1 teaspoon minced garlic
1 lime
Salt and pepper, to taste

Here’s what you do:

Peel and pit the avocados and chop roughly. Place in serving bowl.
Roll the lime on the table or countertop (to release the juices). Cut in half and juice the lime into the avocados. (Bonus: the acid from the lime will prevent browning of the avocados).
Add the garlic, salt, and pepper.
Using a POTATO MASHER (best device ever) smash all the ingredients together until the avocado becomes smoother (leave some chunks).
Dice the tomato into ¼ inch chunks. Mix in tomato and finely diced onion with a fork.
Adjust your seasonings and enjoy!

Some people prefer a spicier guacamole, which is totally fine. Just cut back slightly on the tomato and add some chilies in there. I’d also like to stir some cilantro into the recipe and see how that elevates it to the next level. I’m patiently waiting on a fresh herb delivery from my aunt’s vegetable garden (hint hint).

Here’s a look at the final product. Wouldn’t this be nice alongside a strawberry margarita?!


Do you have a go-to dish that you bring to your summertime barbeques?