Everybody just loves the Fourth of July, myself included. This wonderful celebration of our country is chock full of poolside barbeques, beach trips, cold beers, and good food. It's the ultimate summer celebration!
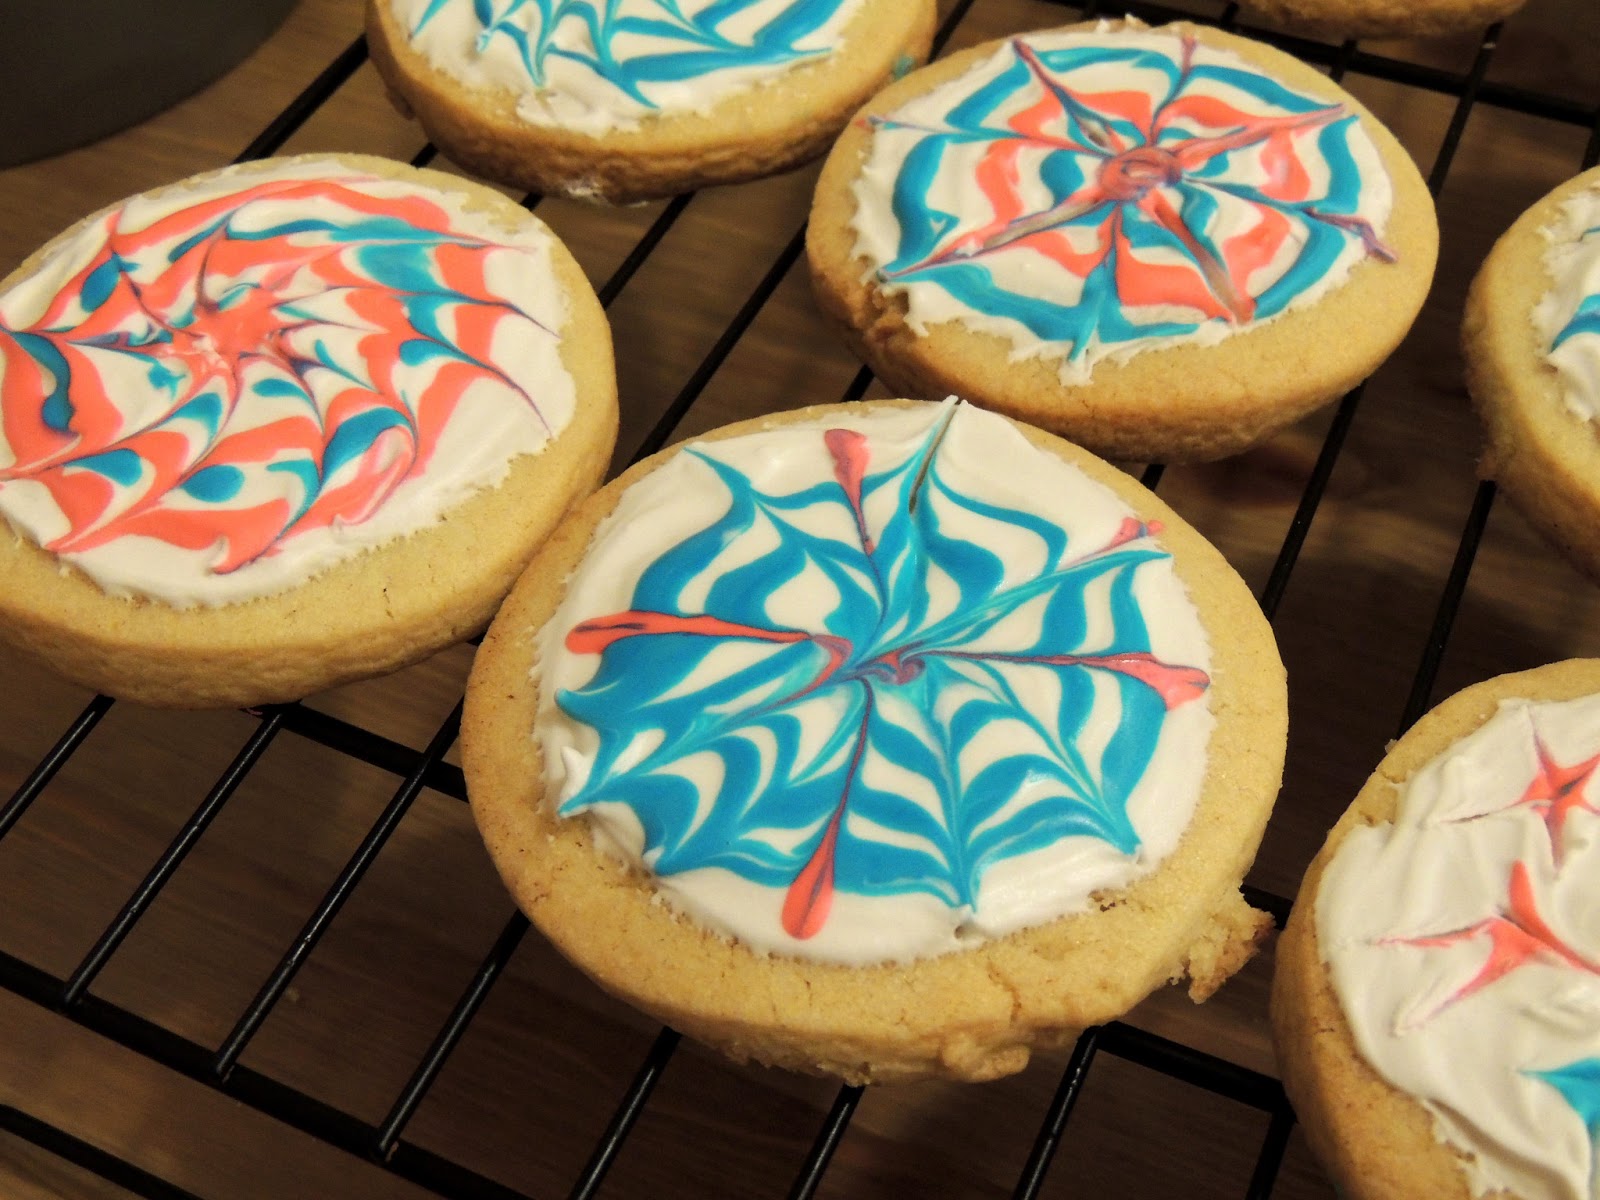
As excited as I am for the actual holiday, I'm pretty sure I'm even more excited about these seriously festive cookies. Let's just say I channeled my inner Martha Stewart. Mostly because these were inspired by a Martha Stewart recipe...
These cookies are decorated using Royal Icing. This icing takes to food coloring really well and is often used to decorate cookies that are given out as favors for showers, birthday parties, baptisms, etc. The icing dries overnight and becomes hard, making it the ideal icing for decorating sugar cookies.
Our round cookies are flooded with white royal icing, then circles are drawn on top. Then, a few quick strokes of a toothpick flare out our circles so that we get the iconic image of a firework on our cookies! How clever is that?!
Although these cookies are a time consuming labor of love, you will be the coolest cat at your Fourth of July celebration when you show up with a batch of these. They are tasty and fun and I cannot explain just how accomplished I felt when the cookies were finished. They are so photogenic!
Disclaimer -- the step by step was just too expansive to photograph. If anything isn't clear just drop a comment down below and I will do my best to clarify--Happy Independence Day!!
Here's what you need for Fourth of July Firework Cookies (Print Recipe!)
For the cookies*
4 cups all-purpose flour
1 teaspoon baking powder
1/2 teaspoon salt
2 sticks unsalted butter, softened
2 cups granulated sugar
2 large eggs, at room temperature
2 teaspoons pure vanilla extract
For the Royal Icing**
3 large egg whites, at room temperature
4 1/2 cups powdered sugar
1/2 teaspoon cream of tartar
1/8 teaspoon salt
1/2 teaspoon or so pure vanilla extract
Red and blue gel food coloring
Here's what you do
For the cookies
In a large bowl, sift together the flour, baking powder and salt. Set aside.
In the bowl of a stand mixer fitted with the paddle attachment, combine the butter and sugar. Beat on medium speed until pale in color and fluffy, about 3 minutes.
With the mixer still running, beat in the eggs one at a time until fully combined. Reduce speed to low and gradually add in the flour mixture. Mix in the vanilla extract. Turn out the dough onto a piece of plastic wrap. Wrap tightly and refrigerate for at least one hour.
Lightly flour a work surface and rolling pin. Turn out the dough onto the floured surface and roll out to about 1/4 inch thick. Flour a round cookie cutter (small, medium, or large cookies will work just fine--it's up to you!) and cut the dough. Transfer the rounds to a baking sheet. Re-roll the scraps once to use up as much dough as possible. Refrigerate for another 30 minutes.
Preheat oven to 325 degrees. Bake cookies until the edges just start to brown, about 17 minutes. Use a spatula to transfer the cookies to a wire rack and allow to cool completely before icing.
For the icing
In the bowl of a stand mixer fitted with the whisk attachment, beat the eggs whites, sugar, cream of tartar and salt on medium-low speed. When combined, add in the vanilla extract. Increase the speed to medium-high, beating until stiff meringue-like peaks form, about 7 to 8 minutes. You will notice the mixture is about triple in volume.
Transfer about 1/3 cup of the icing into two small bowls. Add a few drops of red food coloring to one bowl and a few drops of blue food coloring to the other. Mix gently with a toothpick until desired shades are achieved. You may also want to gradually add a few tablespoons of water to the icing if it is too hard to pipe. This will not affect how it hardens.
Place the white, uncolored icing into a large squirt bottle and the colored icings into two smaller squirt bottles. The squirt bottles make it incredibly easy to make even circles and easily floods the cookies.
To decorate the cookies, outline the edge of each cookie with a bit of the white icing then flood the middle until completely covered. Place a dot of colored icing in the center of the cookies, then make gradually larger circles alternating red and blue. Immediately use a toothpick to drag a line from the center, outward. Then make a line from the outside, inward alternating all around the cookie. Repeat with all the cookies. Let the cookies set at least overnight. Once hardened, store in an airtight container up to three days.

*Cookie recipe from Martha Stewart
**Royal Icing recipe adapted from Williams Sonoma website


No comments:
Post a Comment